Document Viewer
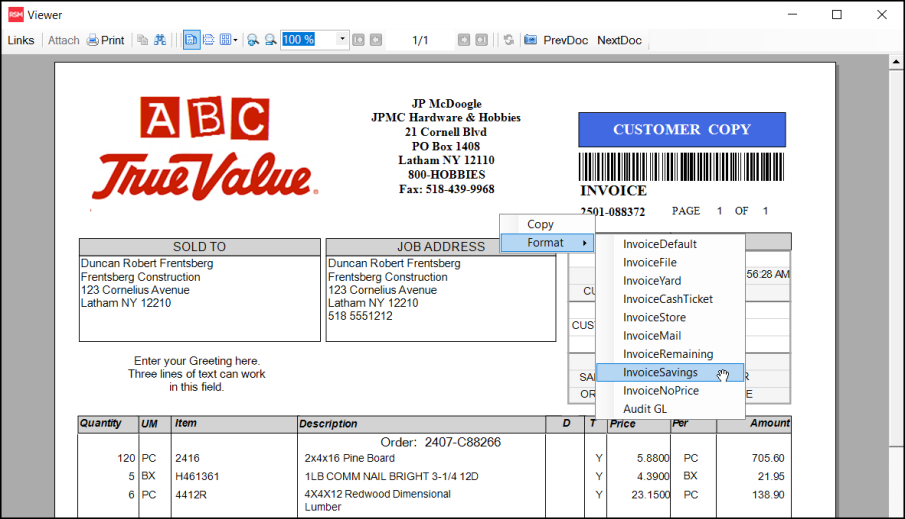
You can use the Document Viewer form to review documents and reports generated by and stored in the application. The Viewer provides access to document links and attachments when they are present in a selected record. Some documents have multiple "styles" or formats that can change the appearance and information presented on the document. You can modify the document style using the alternate mouse menu (usually a right-click) in the Viewer window.
Links
This option opens a sliding panel on the left-hand side of the Viewer to display document links. Document links only apply to documents, not reports; however, some reports do have links to documents embedded within them.
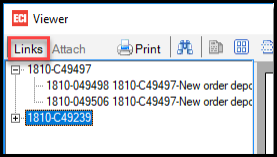
Links use a "tree" control that is comprised of nodes that may "branch" off the tree. When a document listed in the tree has links, the node for that document displays either a "+" or "-" next to the node. The "+" means the node has child nodes that are not being shown. The "-" indicates that the child nodes are currently displayed (visible). Clicking the "+" or "-" toggles the display and either shows or hides the child nodes (document links). As documents are viewed, the new documents links are displayed in addition to any previous documents links that were selected.
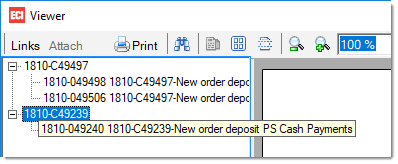
Hovering over a document link displays a "tool tip" listing the document's description and type. Clicking the document ID or description results in that document being displayed in the Viewer.
 Attach (Attachments)
The Viewer's attachment button is only enabled when the current document has attachments. In these cases, the attachment icon is also displayed. Attachments only apply to documents, not reports.
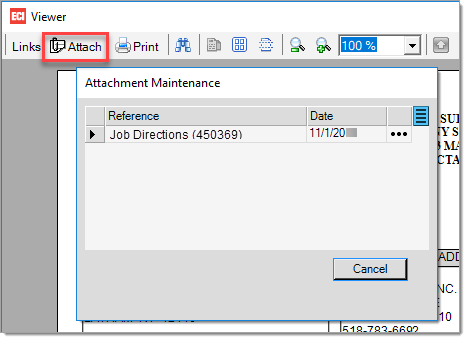
Choosing the "Attach" button displays the "Attachment Maintenance" dialog that allows a user to view the attachment. Changes to the attachments listed are not allowed. New attachments can be added using the Attach (F5) function from the Documents form, Attachment Maintenance (Main Menu, Maintenance, Utilities), or from transactions supporting attachments.
Viewing Two Documents Side by Side
Customers asked us for a way to view two documents at a time, which is particularly useful for comparing similar transactions or reviewing two transaction documents for the same account.
To view two documents side by side:
1. From the Toolbar, choose Documents. The Documents form displays.
2. Use the Document # list or Selection options to open the first document you want to review.
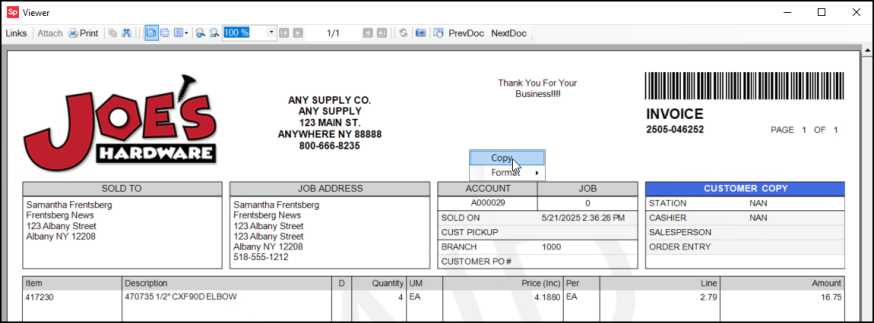
3. Right-click the document and select the Copy option. A copy of the document you opened displays.
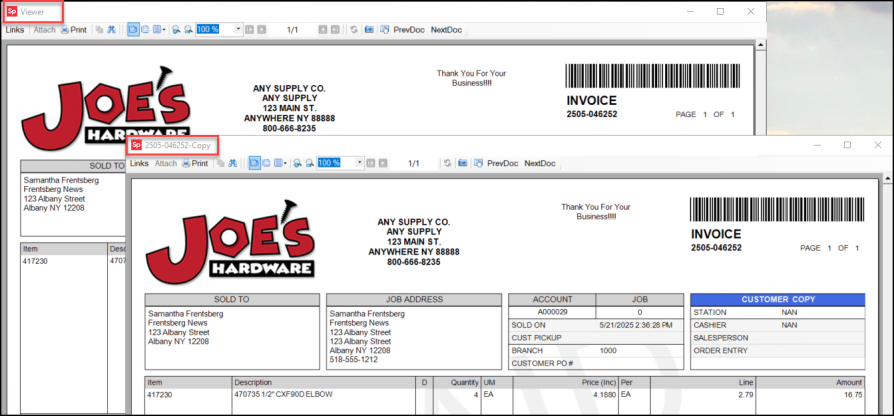
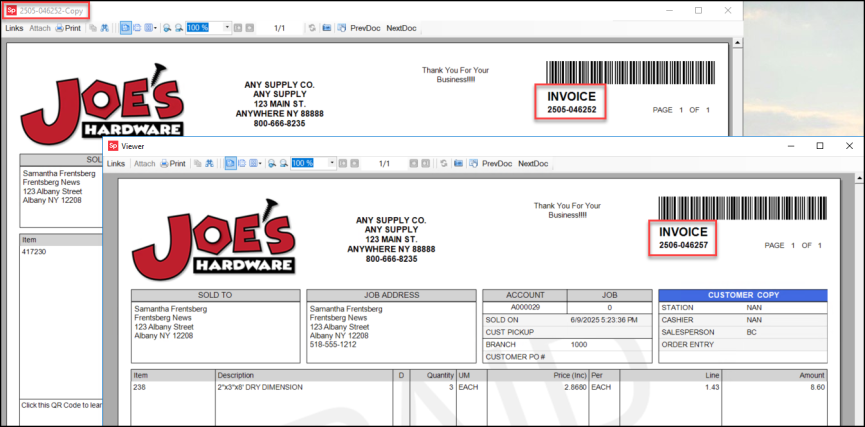
4. Close the Viewer version of the document and open another document in the viewer to view the first and second documents side by side.
Understanding the Document Style Formats
Some document types have multiple styles, to support different audiences who may need transaction information but not the same data that displays on the original document. The information in these documents are all based on the same transaction, but they may contain different details, based on who needs the document. We have developed these formats based on requests from our customers.
For example, when you review the formats available for Order documents, there is the original order document (created for the customer at the time of the order) but also other formats that may be appropriate to the transaction:
-
A document for the Dispatch team so they can collect the items that need to be sent for delivery
-
A document that lists the items on back order for the person in Purchasing who has to follow up on those transactions
-
A document that shows the order but not the pricing for the items requested
-
A file or store copy of the document that may list the items and the costs but not the totals
There are many document formats and the list is different for every type of transaction document and this list is changing as we get new requests for formats. Here are a few quick points about document styles in general:
✓Styles are assigned by printer in the Device Maintenance form (Maintenance > Database > Devices).
✓Default Styles are meant to be the standard and most commonly used format.
✓File copies tend to include information that would not normally be shown to customers (such as item costs and profit information).
✓Dispatch versions relate to documents with delivery status (dates, etc.).
✓The Remaining style used for Point of Sale documents lists ALL unsold items.
✓The Backorder version for Point of Sale documents only includes items that were specifically designated for backorder during invoicing.*
*There are different types of backorders: "ordered vs. sold" is used in Point of Sale and "ordered vs. received" is used with Purchasing. "Remaining" styles are similar to a backorder.
Changing a Document Style
When you change the format of an existing transaction document, it displays the same information in a different way. For example, a yard worker who needs to collect items in a order transaction (for pickup or delivery) does not need to know the cost of the materials s/he is collecting, just where they are, how heavy they are, and when they are going to be needed. Changing the format of the order can provide that information easily.
To change the document style using the format feature:
1. From the Toolbar, choose Documents. The Documents form displays.
2. Use the search criteria to find the document you want to view in the fields provided.
These steps are described in this topic.
3. Click the document you want to review to open it.
4. When the document displays, right-click the mouse to display a context menu.
5. Choose Format from the list to display the list of formats available for the document you selected.
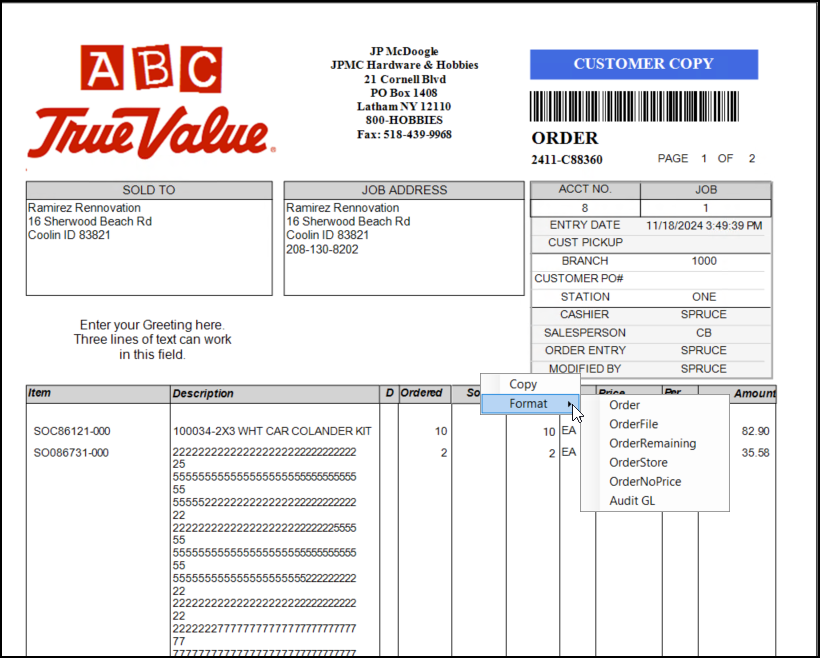
Order Document with List of Default Formats Available
6. Choose a format from the list to display the new document (based on the same transaction).
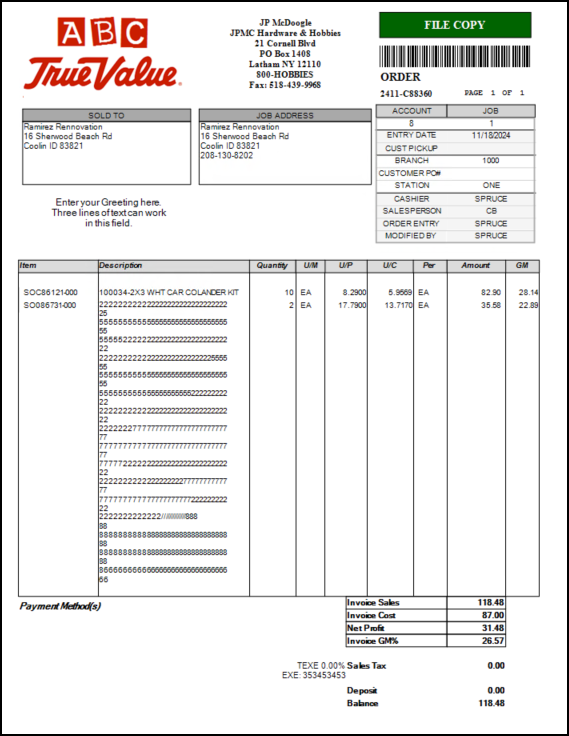
Order > File Copy (Used by Management to Understand the Profitability of the Order)
List of the Document Styles
The following table lists all document formats currently available. All other document types currently offer a default format only.
*Mail formats can be used for printed documents that will be folded and mailed using a windowed envelope. In this case, the delivery and sold-to addresses are printed one above the other so that either may be used.
Document Viewer ToolbarThe following table lists icons and options used on the Document Viewer toolbar and explains what they do:
|
