Adding a Cayan Device to a Station
Each Cayan Genius card device must be associated with a specific station as defined for the application. This is done from the Device Maintenance form as described below.
Before you get started, power on the Cayan device (usually a Verifone MX925 pad) and assign it to a specific static and unique IP address*. Make sure the network settings match your network (for connection to the Internet gateway, DNS servers, etc.), and is connected to the network via cable. If you are replacing an existing device using the same (IP) address, the old device should be unplugged from the network before connecting the new Cayan Genius device.
To add a Cayan device to a station:
1. Log in as a system administrator to complete these steps.
2. From the Main Menu, choose Maintenance > Database > Devices. The Device Maintenance form displays.
-
*A "static" address is an IP address that is assigned to a specific network device and does not change when either network equipment or the device is reset. Network equipment provides the ability to designate a range of "static" addresses to be used for devices where the addressing should not change (or be assigned "dynamically"). DHCP is the opposite of "static" and means that addresses are assigned upon request, and can change. Do not use DHCP. You can change the IP address assigned to the pad by accessing the admin settings by pressing the zero (0) key four times then entering the administrator password).
3. From the Device Name list, choose the station that the device is attached to.
4. Enable (check) the Card Pad check box.
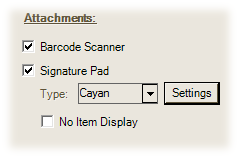
5. From the Type list, choose Cayan. The Cayan Device Settings box displays.
6. Complete the settings in the Cayan Device Settings box as follows:
-
IP Address
Set the IP address to match the one assigned to the Cayan Genius card device being associated with the station. -
Port
The Port is set by default to 8080 and should not be changed unless you are instructed to do so by Support. -
Status Timeout
This timeout is a polling interval (in seconds) for checking the status of the device by the application.
This does not time-out forms or the device when in use... it's only used for determining how often we check to make sure we can communicate with the device. The setting should be between 10 and 30 seconds unless it is determined that a longer or shorter interval is needed. Larger values can cause communication issues.
7. After these settings are complete, choose Accept.
For the best results, we suggest that any Cayan enabled station be assigned to a valid "Ticket" printer (CTP or Cash Ticket Printer). Certain types of receipts only print to this type of printer in plain text format. If you don't have an actual CTP type printer, you can define a new printer as a "ticket" type even if it's a laser printer and use that.
Please note that it IS possible to define more than one application printer device that points to the same Windows Printer name. In this case, cash ticket style documents will be printed to that laser printer on full size paper, but in a text-only format just as they would to an actual CTP.
8. Choose Process (F12) to save the settings changes for the station.
9. Close and restart the application for this station.
10. Sign into the software, and test the item display and card functionality in the Point of Sale > Sales transaction.