AnyWare Tags & Labels
You can use the AnyWare Tags & Labels feature to create tags and labels for items, bins, special orders and other purposes.
Since Android™ platform devices may not support printing on their own, the app prints label using a printer configured on your application server. Until a printer has been configured on the server matching the label printer assigned to the station your device uses (designated in the AnyWare settings), you cannot use this option. If you have not yet configured a label printer for use with your designated station, please read the Label Printer Configuration topic before you continue.
Creating Tags and Labels
When you choose the Tags & Labels option, the Label Selection box displays.
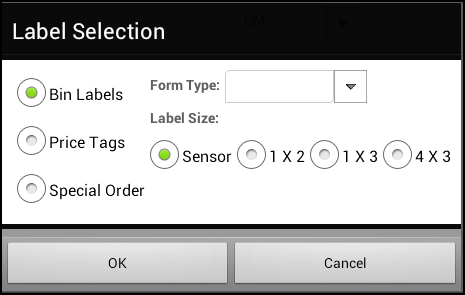
Label Selection Types
Before specifying items, choose a type of label (Bin Labels, Price Tags, or Special Order).
-
Bin Labels
Typically, these labels are used to affix a description to a bin or shelf. The default size for this label is 1" x 3". Bin labels often contain barcodes, but this is optional. -
Price Tags
Typically, these labels are added to products or packaging when possible. These are usually the smallest label (1" x 2") and due to their smaller size, and may or may not include a barcode.
A number of different barcode sizes are provided for use with different label sizes.
Note: Scanner devices may have more issues attempting to scan smaller bar codes, however. -
Special Order
This type of label is intended for associating a product or pallet of materials with a specific customer's order. This is the largest label (3" x 4").
Although this label is named "special order," you can use it for any items associated with a customer's order including stocked materials.
For this reason, you can also use this label for delivery staging purposes and not just to identify special orders.
Form Type
Typically, the Form Type (Template) displays based on the Label Selection Type you make. Only those templates designed for the selected label type display.
The Form templates are designed in the Tags and Label Designer utility in the application.
Label Size
Then you choose the label size (or choose Sensor to auto detect) based on the Label Selection Type you chose in the beginning.
Choose the Sensor option only if your printer is equipped with the media sensor option; otherwise, it's important to specify the proper size.
Although each tag and label type is designed to print on a specific size label, the default size is not necessarily the one you have to choose.
Additionally, selection of a label type doesn't set the size explicitly. Size selections are provided because some printer models cannot automatically sense the label size and will not print properly unless the label size is explicitly set.
The three label sizes are 1" x 2", 1" x 3", and 3" x 4" (vertical x horizontal) and labels are printed horizontally.

Changing the label size does not affect how large the label's printed area will be based on your label type. For example, a price tag printed on a 3" x 4" label will still be printed using just a 1" x 2" area. Conversely, selecting a smaller label type for a larger label format, won't result in smaller print to fit. The largest label is the Special Order label, and the smallest is the Price Tag.
After you have chosen these required options, click OK to move on to Order Item Entry.
Choose Cancel to return to the menu.
Order/Item Entry
You use the upper area of the form to enter or modify the text of the items or orders you want to print labels for.
The form changes somewhat based upon your selection because special order labels require customer order selection whereas the other two types do not.
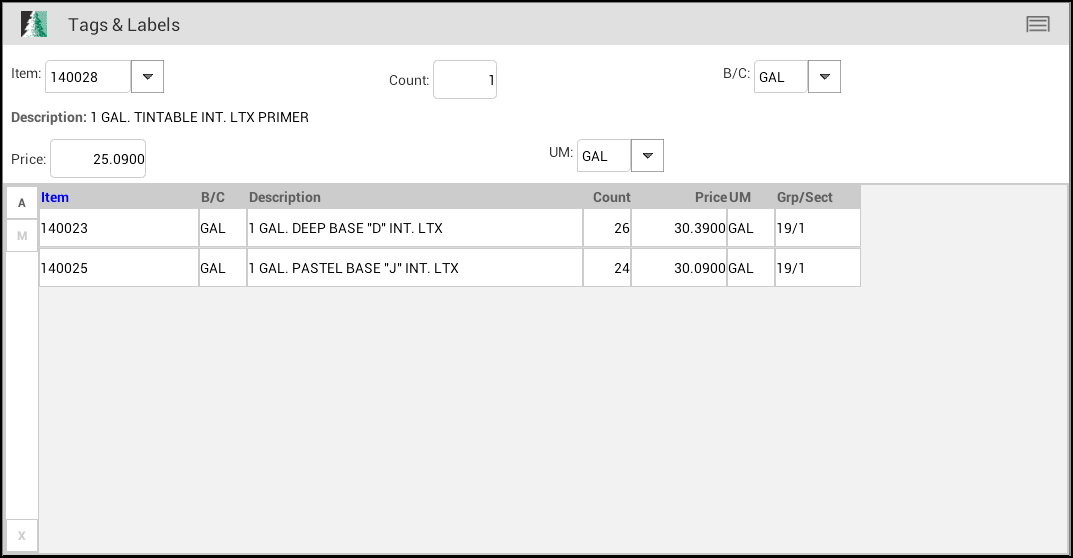
Tags & Labels Order Entry
The Count determines the number of labels that are printed. You can scan both items and order document barcodes (using the Scan option from the menu).
Importing Items by Group/Section or Location
You can also use the Import option to select items by Group/Section or Location Code. Keep in mind that copying large quantities of items may pose issues, due to the possibility of losing a wireless connection. We recommend that you process smaller batches to minimize the possibility of losing work. You can repeat the import process and use either or both options.
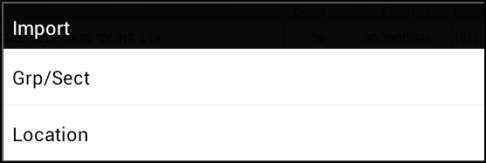
Import Name and Location Options by Group/Section and Location Code Menu
To select an item by Group/Section, choose the Grp/Sect (Group-Section) option to display a list of expandable groups. Tap on the arrow with the circle to expand a group and view the sections. Select a section to import the items assigned to that group and section. Import only one per group and section at a time.
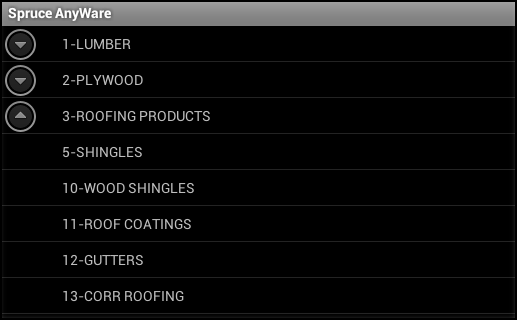
Group/Section List
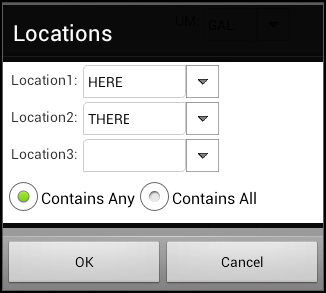
To select an item by Location, choose the Location option to display the Location dialog box. You can specify up to 3 locations and choose whether any or all locations you specify are to be matched against.
-
Choosing Contains Any brings in items that belong to any location you have specified, but not necessarily be assigned to all the locations.
-
Choosing Contains All only imports items that are each assigned to every location you have specified
Once you’re ready to add an item or order and item to the grid area (bottom area), either tap the A (Add) button next to the grid or long press in the grid area and choose Add from the menu that appears.
The data grid shows any previously entered items or orders. Only those items (or orders) listed in the data grid that have a count greater than zero will print a label when you select Process. The data grid scrolls left and right as well as up and down when necessary (and depending upon the display size of your chosen device).
Processing/Printing Tags & Labels
After you have entered, imported, and added all of the orders (or order-items), choose Process from the menu.
Processing requires that you choose a printer (the default will be the label printer designated for the station that your AnyWare app is assigned to).
If you encounter printing issues, it’s important to understand that all printing is managed by a server, not your Android device.
Configuring your Label Printer
After you install the generic print driver, go to the application and define the specific printer you want to associate with the generic printer driver on the server. You add this printer in the Devices Maintenance form (from the Main Menu, choose Maintenance > Database > Devices).
Note: For a new printer that you have not set up before, wait for the daily processing (between business days). The printer will be available in the AnyWare app on the next business day.
Setting up AnyWare to use Tags & Labels
Using AnyWare, you can print from your hand-held devices using the new Remote Client options. Before starting, ensure you have the latest Remote Client service version. Work with your ECI Implementation or Support team member:
-
To find the latest version of the Remote Client service
-
To verify your server URL (specific to your business)
You may also want to check that the printers that AnyWare users need to access have the same names.
To set up the Remote Client service for AnyWare devices:
1. If needed, download the most recent remote client installer from a local computer.
If you have the most recent version installed, skip Step 3.
2. Right-click the installer and run the installer as administrator, following the Setup Wizard instructions.
3. On the station computer, double-click the application link to display the login form.
4. Log in to the application using administrative rights.
5. From the Main Menu, choose Maintenance > Database > Devices to display the Devices Maintenance form. The application selects the Station option by default.
6. In the Device Name field, choose the device name for the AnyWare station and press Enter.
7. In the Branch field, review the branch this station is associated with.
8. Open the System Tray and double-click the Remote Client icon. The Remote Client Utility box displays.
9. Click the Settings tab, and in the Station ID field, enter the Device Name from Step 6.
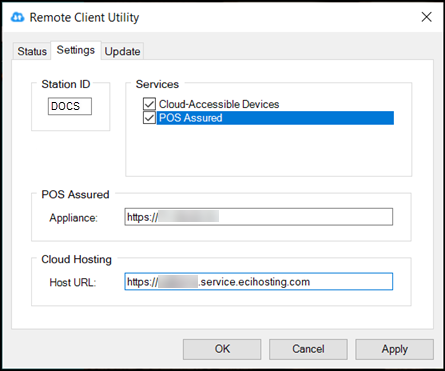
Remote Client Utility > Settings Tab with Device Name in Station ID Field
10. Select the Cloud-Accessible Devices check box.
11. If you use POS Assured, select the POS Assured check box and enter https:// and the IP address of the device in the Appliance field. (Not needed if you do not use POS Assured).
12. In the Host URL field, enter: https://XXX.service.ecihosting.com
Note: This is the URL you discussed with your ECI team member above.
13. When you have completed these entries, select Apply.
14. In the Remote Client Utility, choose the Status tab to verify the Remote Client is running and that the cloud host is connected.
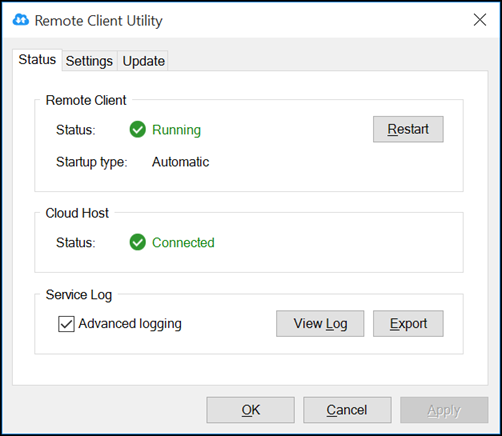
Remote Client Utility > Status Tab
15. Return to the application and log out.
16. Log in to the application again using the ID associated with the Device name/Station ID you used in Step 9.
17. From the Main Menu, choose Maintenance > Database > Devices to display the Devices Maintenance form.
18. In the Device Name field, choose the Device Name from Step 6 and press Enter.
19. In the Remote Client box, select the Enabled check box.
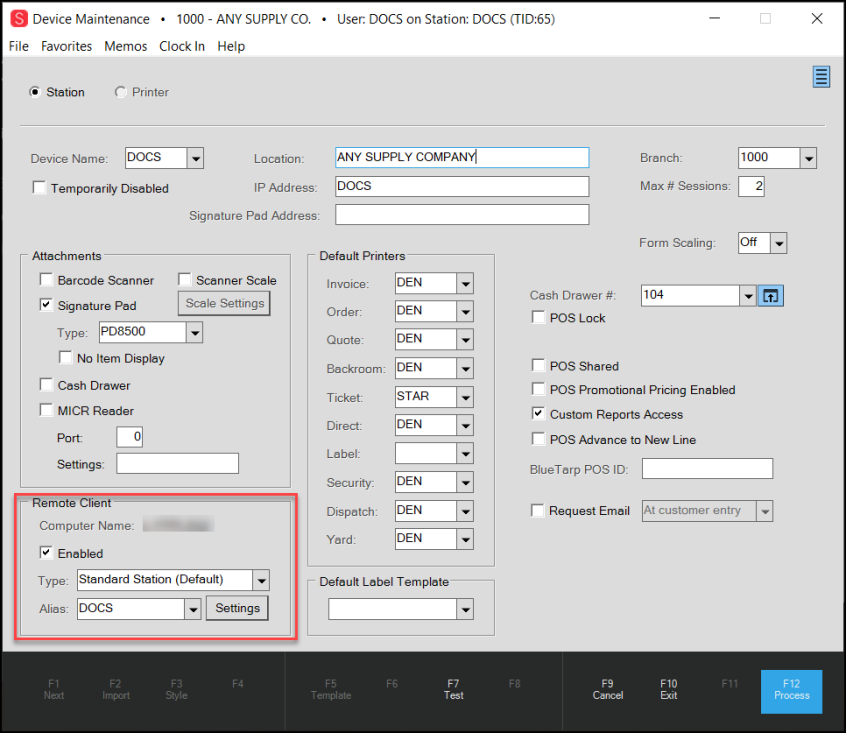
Device Maintenance Form with Enabled Check Box Highlighted
20. In the Alias field, enter an Alias ID, which your AnyWare devices can use to access the remote client-connected printers.
21. Choose Process (F12) to save this setting.
Accept any non-fatal task warnings. The Remote Authorization PIN box displays a number.
-
Remove Client Service authorization PIN - ####
The Remote Client Service prompts you for a PIN.
-
Enter the four digit PINprovided by your station to authorize the Remote Client to communicate.
22. Enter the PIN the application provided in the field and click Accept.
23. Return to the application and log off.
24. Log back in and choose Maintenance > Database > Devices to display the Device Maintenance form.
25. Click the Printer button and review the Windows Printer list to ensure that the list of printers is the local list you expect.
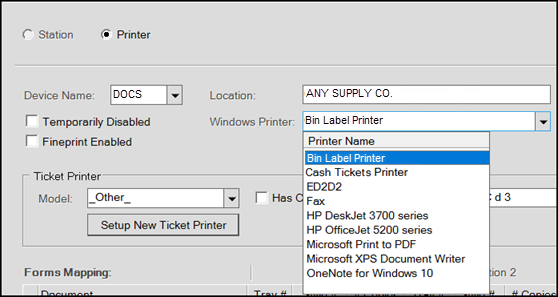
Device Maintenance Form with Windows Printers Displaying
26. To test this connection, add a new printer, and print a Point of Sale document from it.
After you set up the remote client connection for the station, you can use the station alias to set up the AnyWare device to use the remote client printers.
For each AnyWare device:
1. From the Main Menu, choose Maintenance > Database > Devices to display the Device Maintenance form.
2. Create a station that is unique for the AnyWare Device.
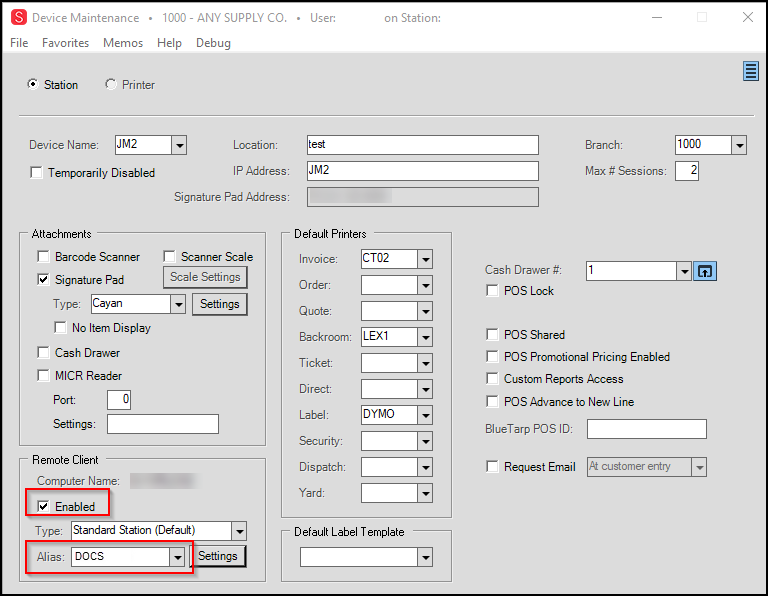
Device Maintenance Form > AnyWare Settings
3. In the Remote Client section, choose the Enabled check box and the Alias setting from the previous instructions.
4. Choose Process (F12) to save these settings.
5. Open the application on the corresponding AnyWare device and choose the Menu  icon in the upper right corner.
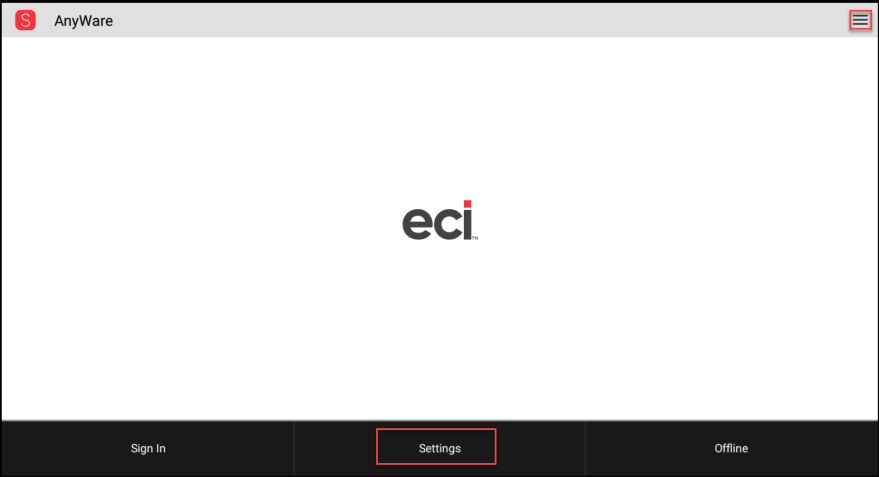
AnyWare with Menu and Settings Highlighted
6. Click the Settings option. The AnyWare Configuration list displays.
7. Click the Station option.

AnyWare with Station Entry
8. Enter the same Station ID from Step 2 and click OK.
9. Go to the AnyWare Homepage, choose the Menu icon again, and sign in.
10. In the upper left corner, choose the Logo ![]() icon to display the Login Status options.
icon to display the Login Status options.
11. Choose the Refresh Printers button. This enables access to the remote client printers.
When you print documents using the AnyWare app, remote printer options are available in the list.