Branch Setup > Footers & QR Codes Tab
Adding Branch-Specific Info to POS Documents
If your business has more than one location or you have more than one business that has different client types, you may be tired of using generic messages in your Point of Sale documents that don’t really mean much to your customers. Now you can add QR codes and footer messages to share exciting promotions, branch-specific financing options, and local community events that each location may be organizing, right from the Branch Setup form.
Before you get started, it may make sense to review the system default settings in the Maintenance > Database > Parameters > Point of Sale > Documents form. This is the content that displays by default if you do not modify it for each branch.
Then, in the Branch Setup form, there is a new Documents tab at the bottom with two subtabs.
-
The Messages subtab defines the Messages text that displays on specific Point of Sale and POS Assured documents. This subtab is not new, we have just added it to the Documents tab.
-
The Footers and QR Codes subtab allows you to specify unique text and URLs for your branch’s Point of Sale document footers. When you enter a URL in the QR Code field, the application converts it into a QR code that displays at the bottom of your specified Point of Sale document.
Note: You can still use the system default messages and QR codes if you prefer.
In the Footers and QR Codes subtab, you can add new branch-specific text and add QR codes to populate your point of sale documents and tickets. There are many online sites that give you a way to create these codes. When you have the URL for the code, you are ready to get started!
To add unique footers and QR codes to your Point of Sale documents:
1. From the Main Menu, choose Maintenance > Database > Branches to display the Branch Setup form.
2. From the Branch ID list, choose the branch you want to change the messaging for.
3. Click the Documents tab and the Footers and QR Codes subtab to display new options.
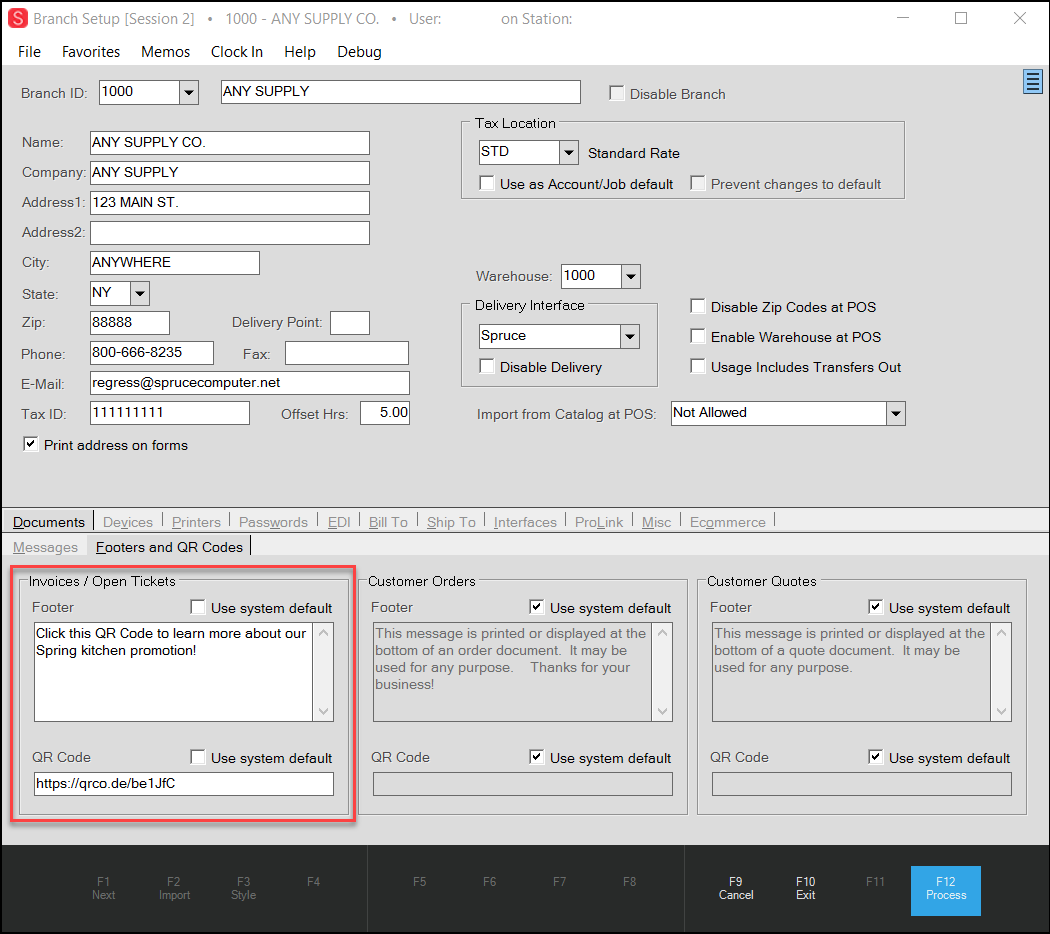
Branch Setup with Footers and QR Codes Subtab Highlighted
4. To set a branch-specific footer and QR code for your documents, consider the document types (Invoices and Open Tickets, Customer Orders, and/or Customer Quotes) and complete the following entries for the document type(s) you want to update:
Note: The footer text does not display on cash tickets. This message displays on document records referred to here.
-
Uncheck the Use system default check boxes to enable the entry fields for the document type you want to change.
-
In the Footer box, enter the custom wording you want to appear in the footer of these documents. You can enter up to 800 characters in this field.
-
In the QR Code field, enter the URL for the QR code you created. You can enter up to 256 characters in this field. The application will convert this entry into a QR code image on the footer of the documents specified.
5. When you have completed these settings, choose Process (F12) to save them.
When you add a sale (or order, or quote, or whatever you have added to the Branch Setup), the new QR code and message displays in the footer of your document for your customer to use.
Why are Branch-Specific Footers and QR Codes Useful?
Footer messages on your orders and QR codes that are specific to each branch may provide extra information to your customers that might be helpful to them and to you. Since QR codes can provide more information than simple barcodes, you can use them to provide information about your return policy, financing for future projects, and provide links to information about upcoming events. They can set your store locations apart and connect your business to your customers and your community.